How to use Git Bash commands and Git Commands to host your code on GitHub.

I am a Frontend Engineer from Lagos Nigeria who loves to write and document anything tech-related, contribute to open source projects.
You can check out my portfolio https://marysho.netlify.app
This is a continuation of the Installing Git and Git Setup article.
The goal of this tutorial is to learn how to use git and git bash commands by creating a simple file and pushing it to GitHub using Git Bash and Git Commands.
Prerequisites
To follow through with this article, you need to have a clear understanding of Git, Git commands and Git Bash commands, and have a personal GitHub Account. Here's a link to sign up for GitHub.
GitHub is a code hosting service for software development, collaboration and version control using Git. It helps developers and other collaborators to import and keep track of their projects, collaborate and contribute to projects.
Through hosting your code to GitHub, you would have used the Git or git command one way or the other. There are different methods of hosting your code or project on GitHub.
Importing your project to GitHub through the command line.
Importing your project to GitHub by initializing an existing repository.
Importing code from another repository.
As a beginner to Git, we will consider the first two methods above
Importing your project to Github through the command line
Step 1: Log in to your GitHub
As I said previously, to follow through these steps, you need a GitHub account. Sign up here if you haven't. Login to your Github Account if you have signed up already.
Step 2: Creating a Repository
A repository is essentially a project. It is a collection that stores every file including images, videos, folders, datasets and more of your project.
To create a repository, at the top-right corner of your profile page, click on the "New" option

On the Create New Repository page, type in the Repository Name in the box provided
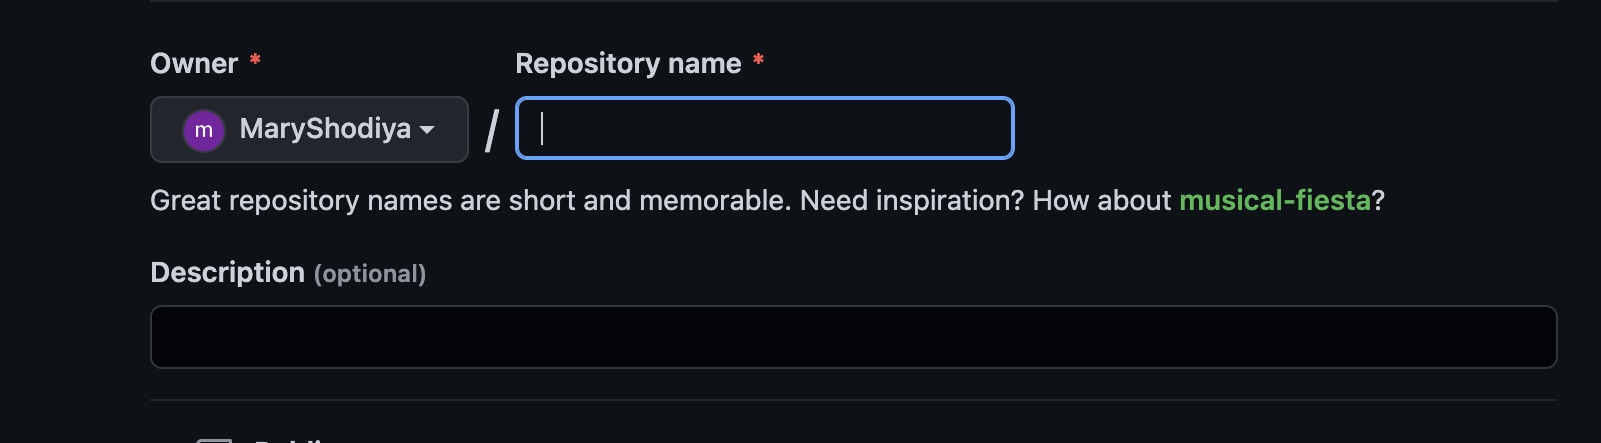
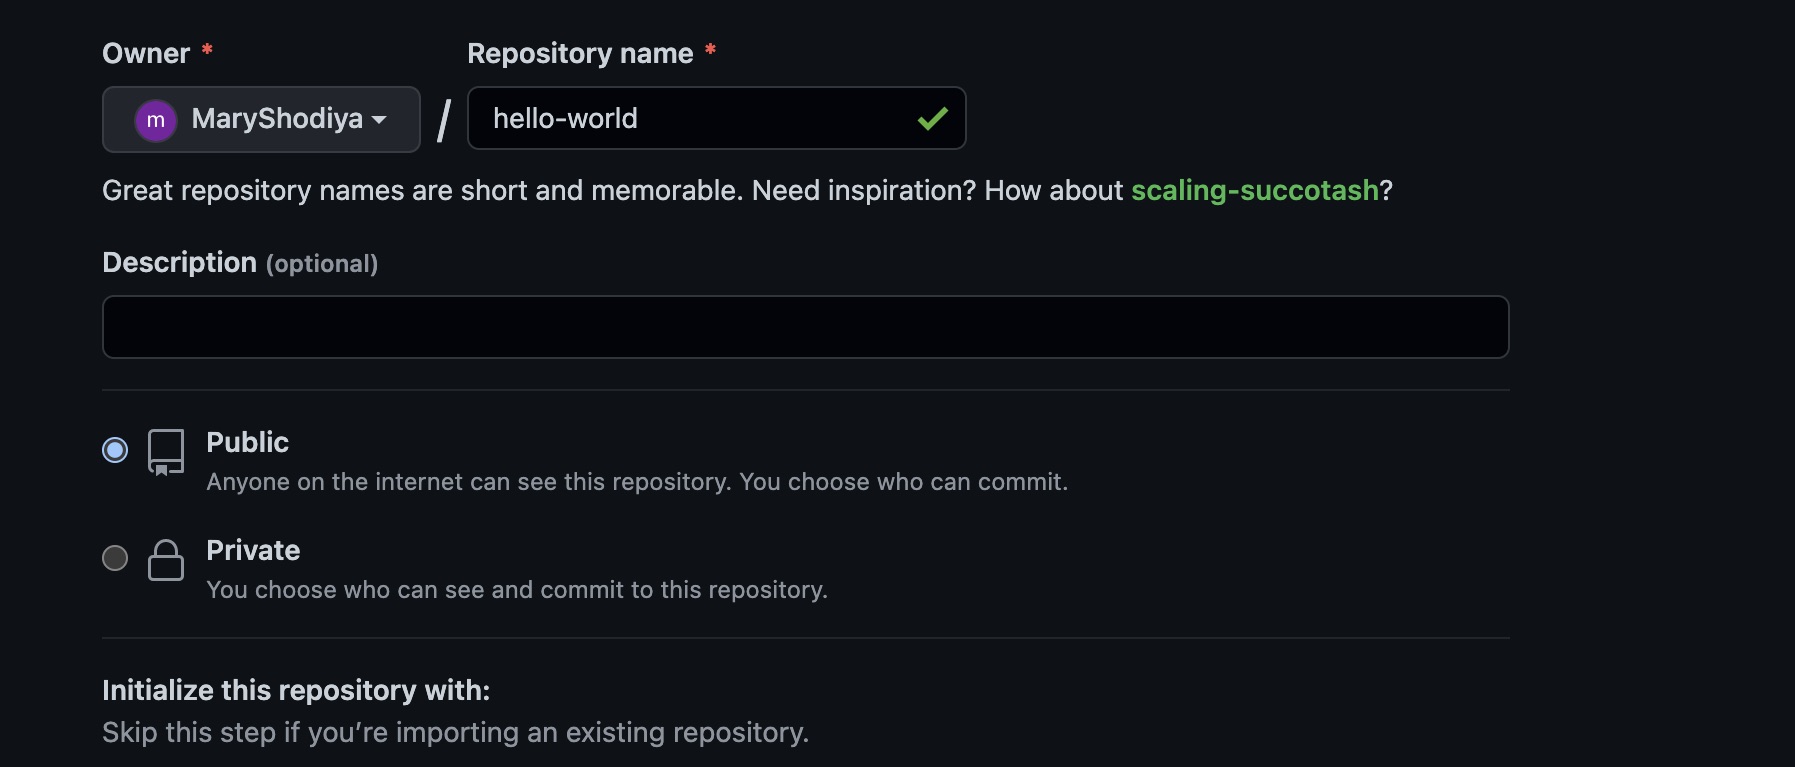
Your Repository is set to public by default, that is, everyone can see the repository. You may choose to make your repository private.
An option of creating a ReadMe File is provided. A ReadMe File contains the details of your project. It helps others know what your project is about and what is included in the repository.
You may choose to create a readme file directly from GitHub after naming your repository by checking the box that reads “Add a README file” or you may choose to create one like any other file from the editor you are using.
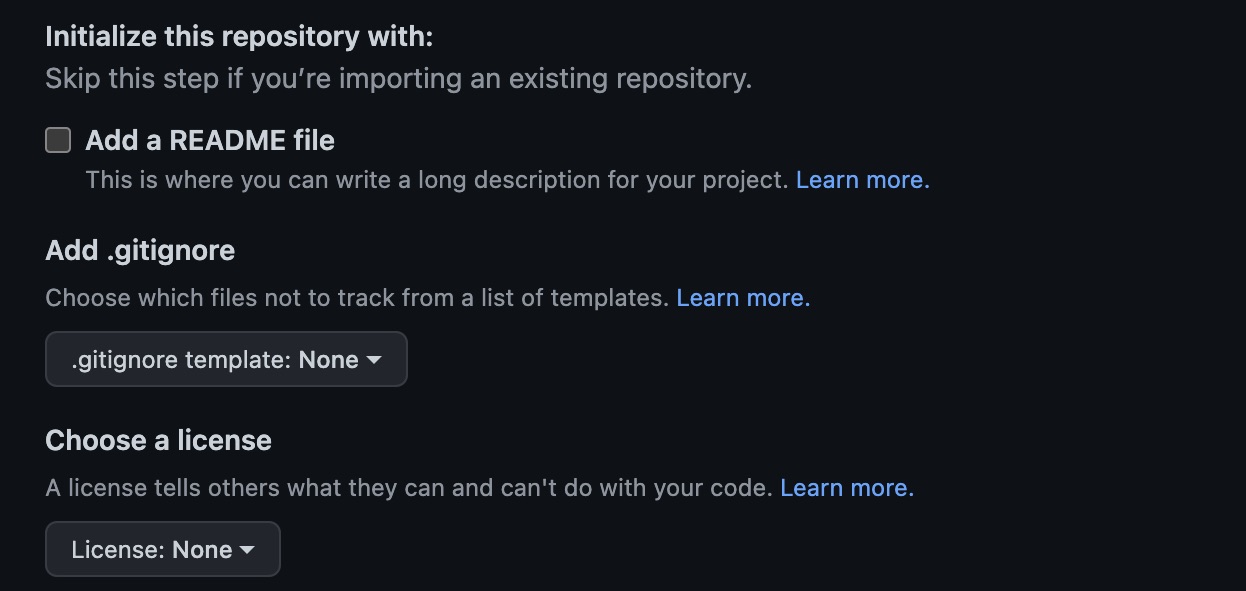
Just like ReadMe, an option of adding a ".gitignore" file is provided, if it is not created directly from GitHub, it can be created from the terminal just like creating any other file. It is best practice to create a git ignore file in the root directory.
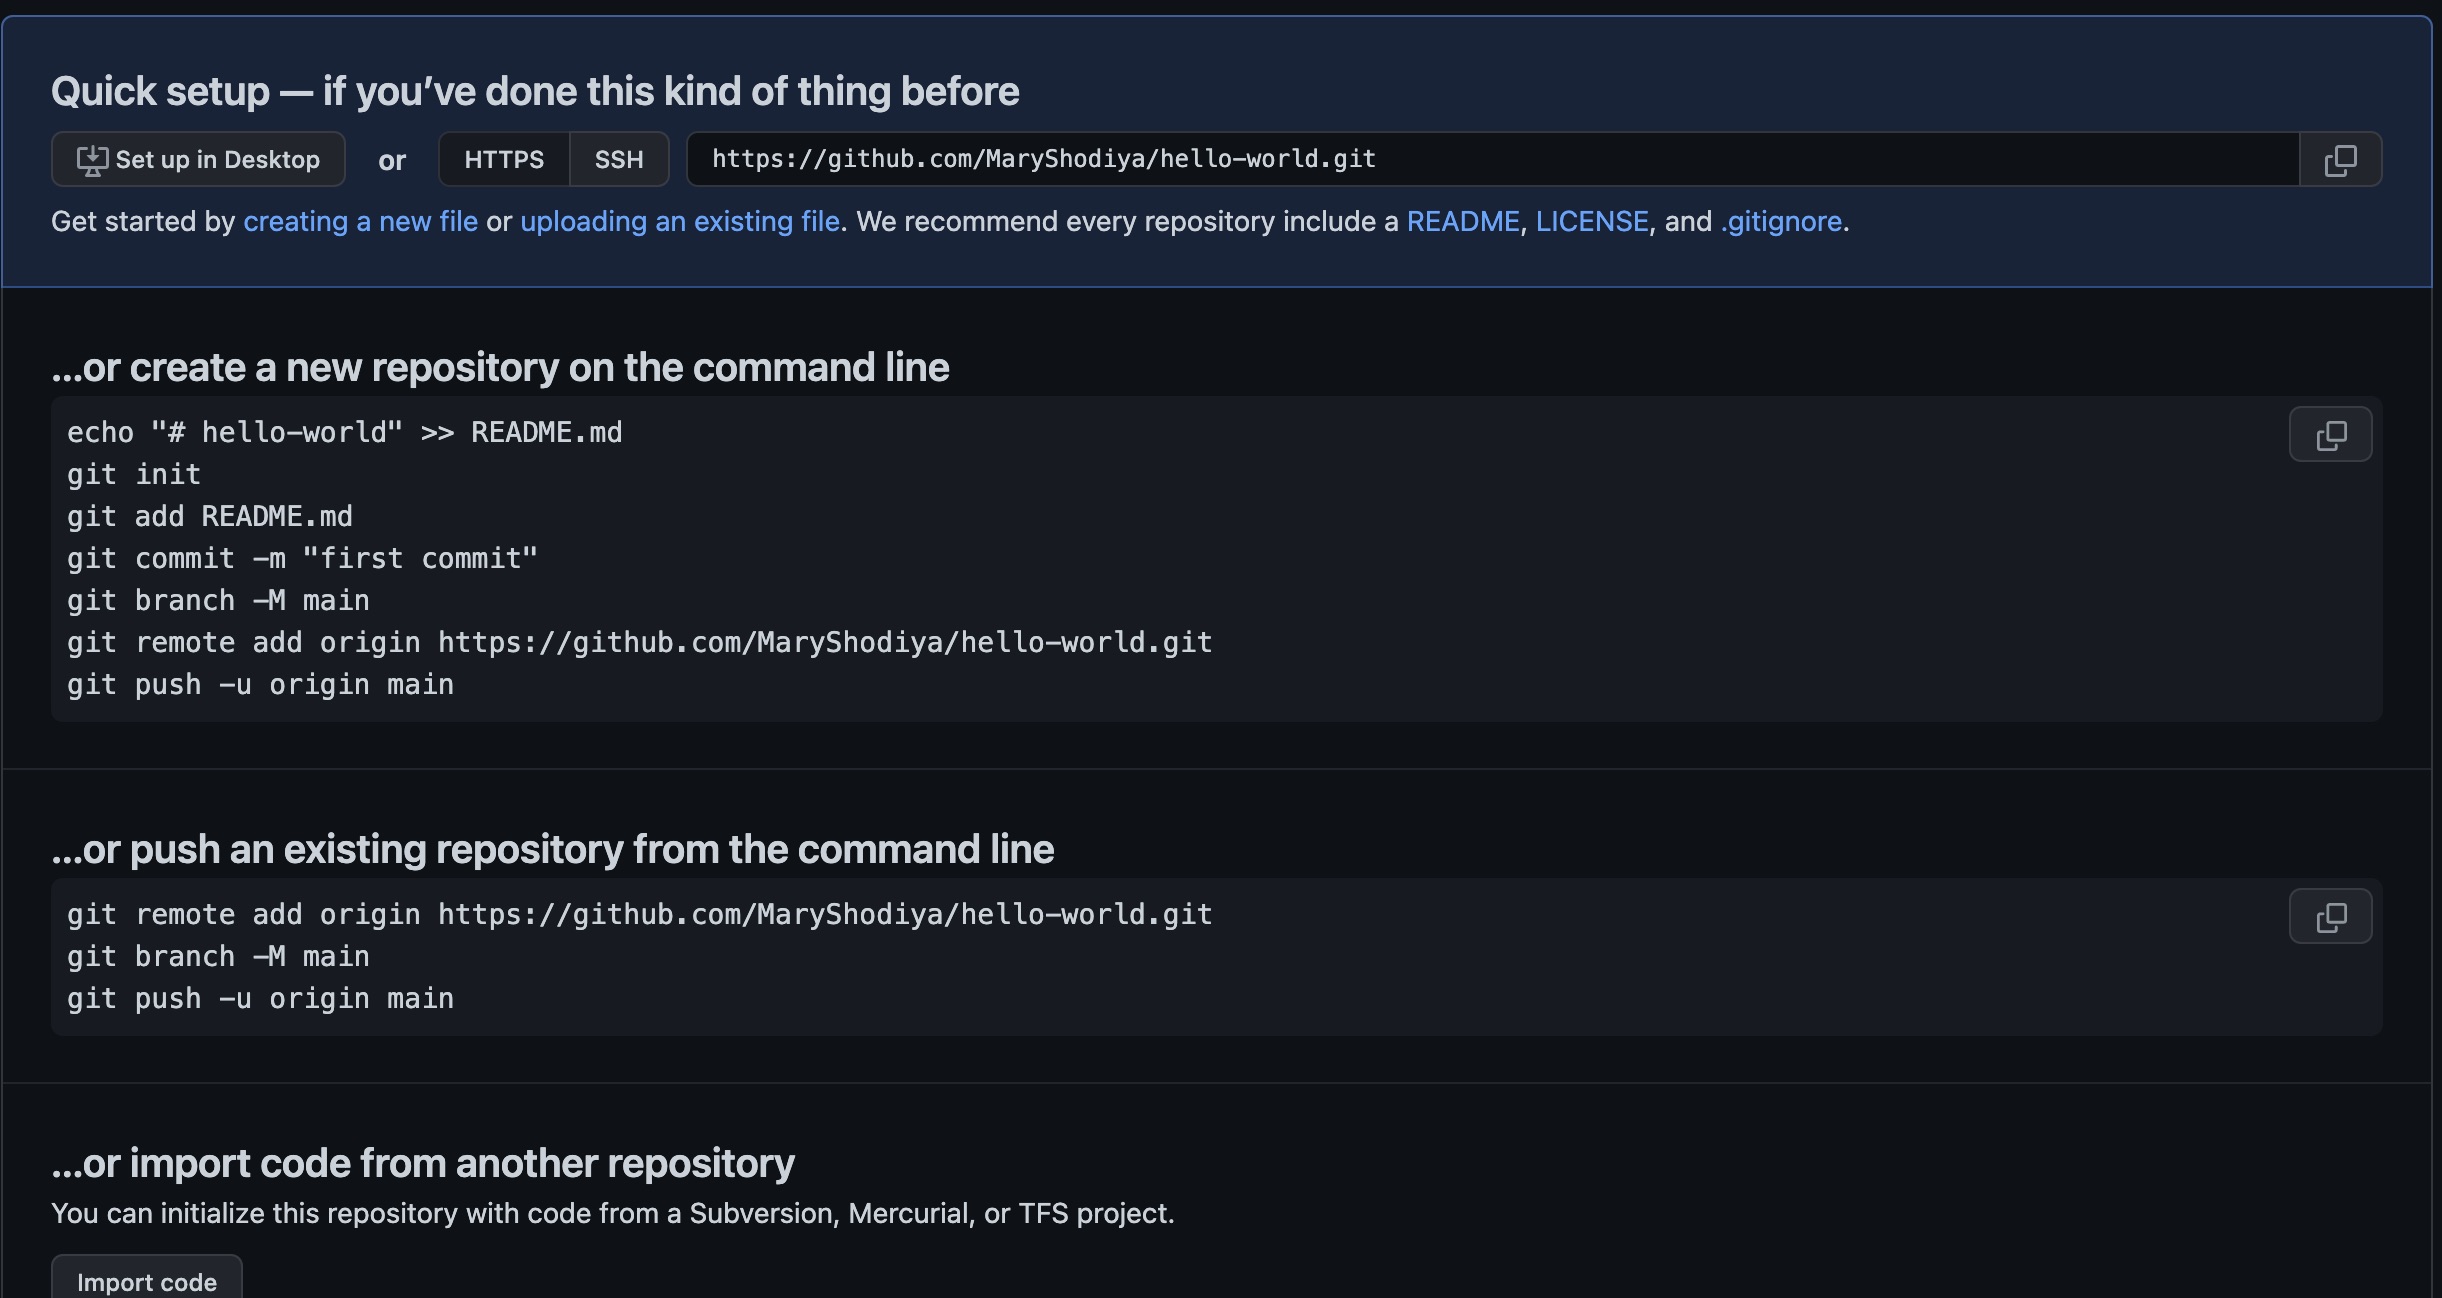
Then click "Create Repository". This prompt takes you to the repository page where a set of instructions by GitHub have been listed to assist you to set up your repository and successfully import your project to your GitHub repository through the command line.
Step 3: Copy the Repository Url
On the command line, copy the URL of the repository
Step 4: Installing Git
In the previous article, I gave a detailed explanation of installing git and listing the basic git commands and git bash commands. If you are new to git, I suggest you go through the article first.
If you have Git, open the command prompt in Mac or Windows Terminal.
Step 5: Clone the Repository to your Git Terminal
Using the git clone command, clone the repository by pasting the copied repository URL in step three alongside the git clone command on your terminal.
git clone https://github.com/MaryShodita/hello-world.git
This creates a full copy of the hello-world repository data.
Step 6: Change your Directory
Change the directory on your terminal to the present working directory by using the ``cd``` command.
cd hello-world

Step 7: Create a Branch [optional]
When changing from the master branch which is the default branch in git. To set main as the default branch, you run git config --global init.defaultBranch main or simply create any branch name of your choice by running the command git checkout [branch name].
In this case, we tagged our branch Name as "hello-branch" so we run git checkout hello-branch in the terminal.
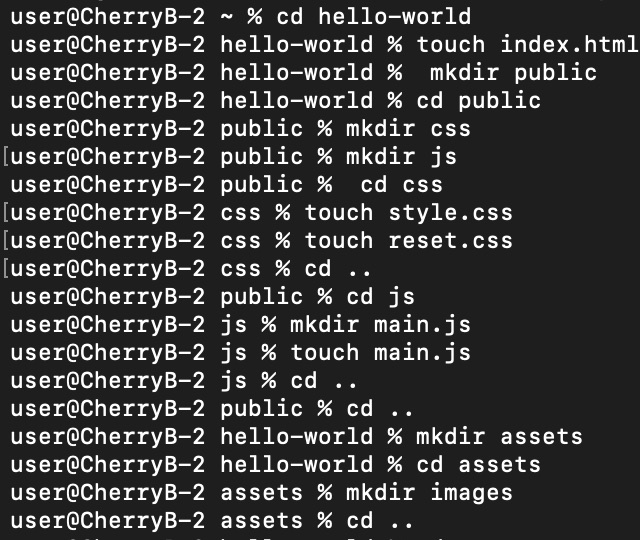
Step 7: Add Files/Folders to the Directory.
Next is to edit the repository and add files and probably folders if we want to the hello-world repository
In the previous article, we made a full list of how files and folders can be added using the Git Bash commands
Here, we will be adding an HTML file, a public folder with a CSS folder and a javascript folder. The CSS folder would contain the style.css and reset.css files. The Javascript folder would contain the main.js file. Then lastly, an assets folder with an Images folder and image files in it.
Step 8: Open the Project Directory in a Code Editor
In this case, I am using the VScode. The VsCode known as the Visual Code Editor is a source-code editor made by Microsoft with the Electron Framework, for Windows, Linux and macOS. It is an excellent editor for code debugging, refactoring, and highlighting syntaxes and it comes with extensions.
Step 9: Edit the Files from the Editor
For this tutorial, we will be adding just a few codes to the HTML and CSS files and a demo image. You can choose to edit your code as you want.
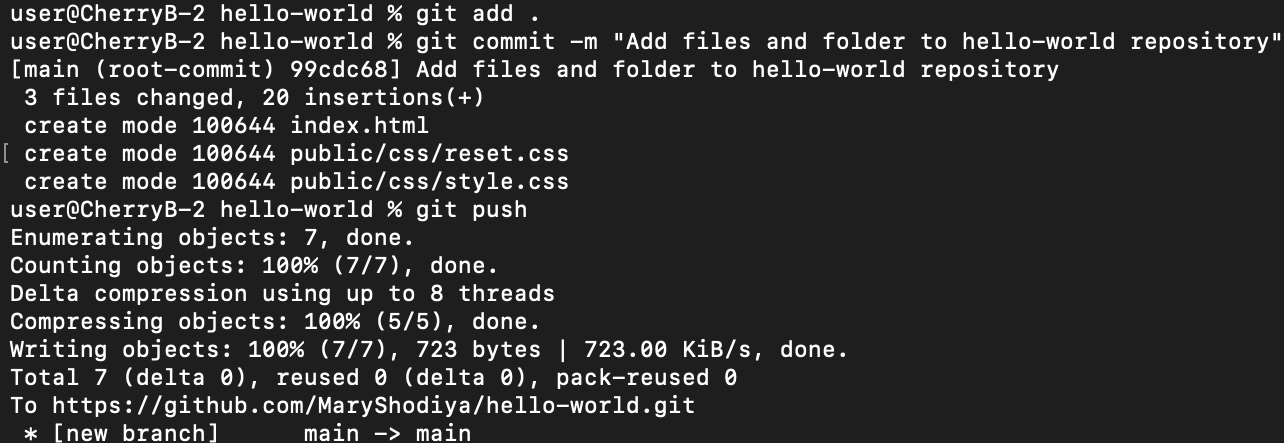
Step 10: Add the Files and Folders to the Staging Area
With git add <FileName> we can add each file separately to the staging area to be submitted
However, for a cleaner code and to stage all files, we will use the git add . or git add -A
On your terminal, ensure you have your repository name as the current directory like mine.

Stage 11: Commit the staged files
To store all the files in the repository, the ``git commit`` would be used. Remember, you need to add a message with the ``-m``` followed by a quotation. The message should be in the present tense.

Stage 11: Push the committed files to the remote repository on Github
Finally, push the committed files and folders to GitHub by running the command git push or git push origin [branchName] to send all changes made on the branch to the remote repository.
Go on GitHub and check out the changes you have made by going to your profile page, navigating to your repositories folder, finding the repository you just pushed with the repository name, open it, all your files and folders should be in it.
After the first commit, you can make changes to the repository however you want.

You can check out a copy of the repository here
Let's look at the second method of importing your project to Github by initializing an existing repository.
Importing your project to GitHub by initializing an existing repository
So let's say, you have your files and folders with your codes in them seating pretty in your editor and you want to push it to an existing repository on GitHub.
This is because as against the first method of importing your project, you did not copy and clone the repository from GitHub and added files in it directly from the command line.
Instead, you created or built your project straight from the code editor. Now, you need to import this project to GitHub.
Step 1: Create your Repository
Step 2: Initialize a repository
Step 3: Add a ReadMe File [optional]
Step 4: Add all the files and folders to the staging area
Step 5: Commit all staged file
Step 6: Add the committed file to the repository by running the command git remote add origin <repository url> .
Step 7: Push the committed files to the remote repository on GitHub by running git push .
Like before, open your GitHub account to confirm and see your projects in your repository.
Viola! You are done!
Now you are familiar with Git Commands and GitBash Commands and you see how they are used to create files and import those files to Github with no hassle.
If you have questions or you need help, you can reach me on Twitter


